
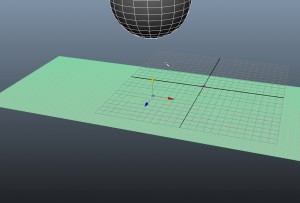
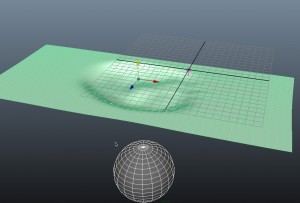
We will create a swell of water that ripples outward in Maya. The setup. Below is a polygon plane that has a high vertex count. Above it is a polygon sphere.
The ocean is made of cloth.
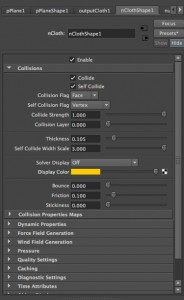
Here is the attribute editor of the plane. This is after selecting the plane and setting the Main Menu Selector to nDynamics, then going to nMesh and selecting Create nCloth. The vertices of the plane have been turned into particles.
The ball is under the power of gravity.
Next, we place the ball above the plane, select the ball, and then select Fields, then Gravity. (You might want to check the attributes of the gravity field to make sure it is going downward in the y dimension, in case the default is set otherwise.)
The plane has an ocean shader on it.
Then we go to Window, choose Rendering Editors, then Hypershade. Then click on the Ocean Shader to make an instance of it.
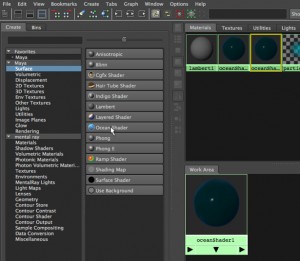
Next, we select the plane in the Main window. Then we select the ocean shader in the Hypershade, right click, and choose Assign Material to Selection.
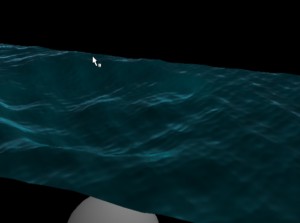
The ball falls through the water.
Then we set the scene up with perhaps 200 frames. We then play the scene, with the ball starting up in the air and falling through the plane.
Here is what it looks like after the ball passes through.
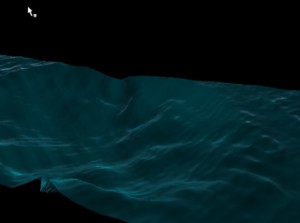
The water creates a rippling swell.
As the scene continues, the water develops a deep swell that ripples.
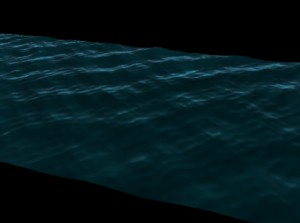
Here are three frames. The first is BEFORE the ball falls. The second is after the ball has just passed through, and the third is a number of frames later: