3D animation tutorials

Bump maps versus displacement maps in Maya.

In the video tutorials on 3DbyBuzz, we have looked at the tradeoff between painstakingly crafting detailed geometry versus using bump maps to simulate geometric detail. Here, we look at another alternative, displacement maps, and compare it to bump maps.

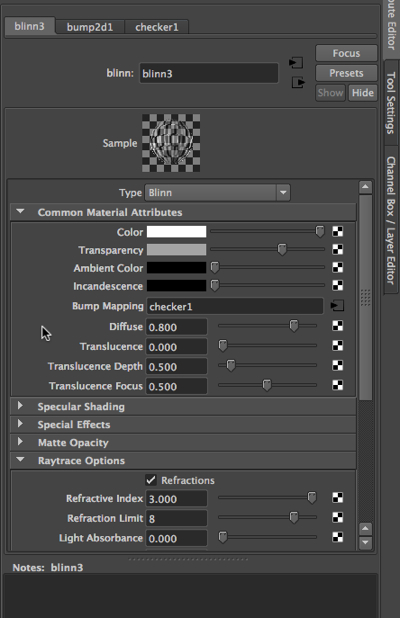
Bump Maps. As a reminder, a bump map does not change the geometry of an object.  Rather, the normals information in a texture is used to create the illusion of texture on a model. Here is a Blinn material with a checkerboard bumpmap applied to it:


bumpmap-2013-03-5-23-16.jpg

This was created by first creating a Blinn material in the Hypershade, then creating a checkerboard texture in the Hypershade.  Then, with the material selected, the texture was middle-mouse-button dragged to the Bump Mapping box in the attribute editor above.

Displacement maps.

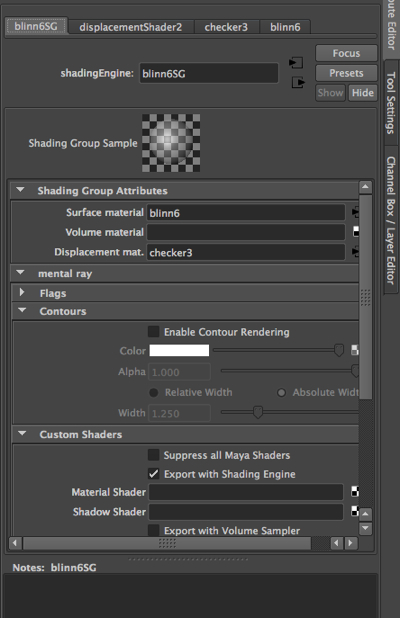
Here is another Blinn material, but this time, instead of using a bump map, we are using a displacement map.  We don’t do this by selecting the material itself.  Rather, we go to the Hypershade and choose the Shading Groups tab (instead of the Materials tab).  Then we select the second Blinn. We then create another checkerboard texture and drag it to the Displacement Mat box in the attribute editor of the Blinn Shading node.


displacementmap-2013-03-5-23-16.jpg

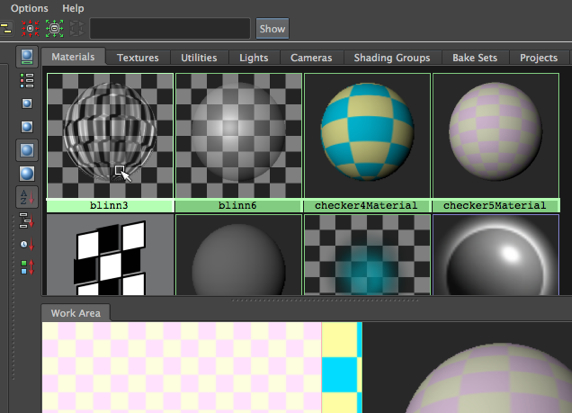
To emphasize this distinction, the image below shows the various tabs in the Hypershade window.  Notice that the two Blinns are labeled blinn3 and blinn6, and Maya provides very different icons for the two of them.  The first icon gives us a hint that a bump map has been applied.  The second icon is more abstract and indicates that we are using a different technique, namely displacement mapping. Notice also that the Materials and the Shading Groups tabs are quite different.


materials-2013-03-5-23-16.jpg

The resulting render.

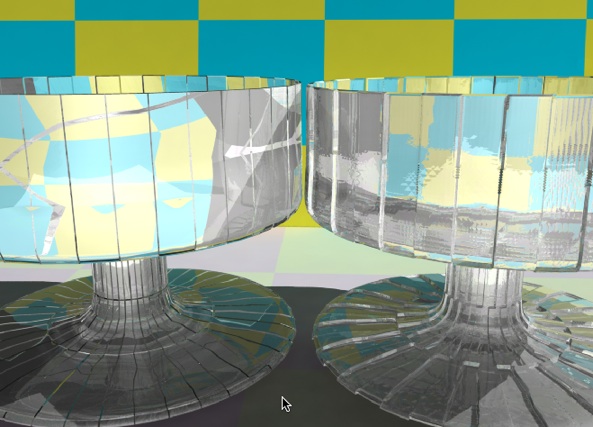
Below are two versions of a polygon glass dish in the same rendering.  They are identical geometrically.  On the left, a bump map has been used to create the feeling of detailed geometry.  On the right, a displacement map has been used instead. And the attributes of how the texture has been projected onto the material are identical.  The only difference is that in one, the texture serves as a bump map, and in the other, it serves as a displacement map.

The bump map.

The bump map creates an illusion of texture, but does not give us internal shadows or the sorts of light refractions that true, geometrically thick and detailed glass would.

The displacement map.

The displacement map, on the other hand, does much better.  However, it too, is only a simulation, although one that demands more computational time.  The geometry of the glass dish has not been changed; rather, at the point of rendering, Maya has substituted a 3D representation of the model, thus providing a true 3D rendering. Notice the depth of detail on the dish on the right.  The top of the dish gives a mottled look to the checkerboard that is reflected back to the viewer, while the one on the left simply bends the lines in the checkerboard. And the base of the right dish looks like true geometry, while the one on the left looks like there are simply dark lines drawn across the glass.  We’re getting the kinds of internal shadows (shadows being cast by a model onto itself) we expect with true geometry.

In sum.

All in all, the displacement map gives us a much richer sense of thick, cut glass. You can left click on the image below to blow it up:
 

renderfinal2-2013-03-5-23-16.jpg

3D animation tutorials

Adding ray trace shadows and mental ray sun sky to the bottle.

This is a continuation of the previous blog posting.

Ray trace shadows.

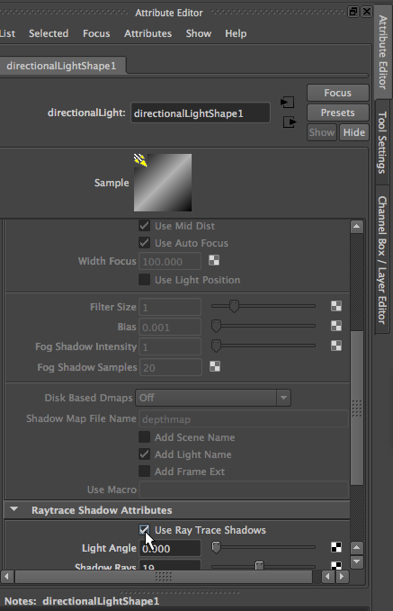
First, we switch from Depth Map to Ray Trace shadows:


raytracesettings-2013-03-4-15-02.jpg

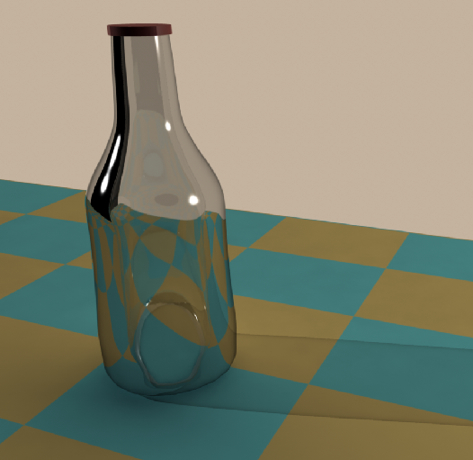
Here is what we get:

raytrace-2013-03-4-15-02.jpg

We see that the shadow is softer.


The Mental Ray sun and sky.
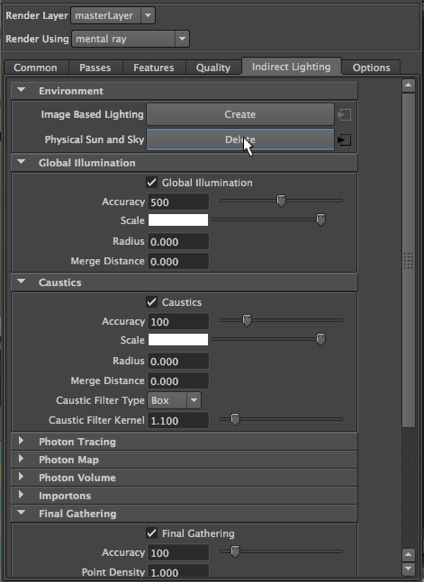
Now, we go into the Options settings of the Render View window and click on Physical Sun and Sky, which introduces a special shader, along with some added lighting:

sksysettings-2013-03-4-15-02.jpg
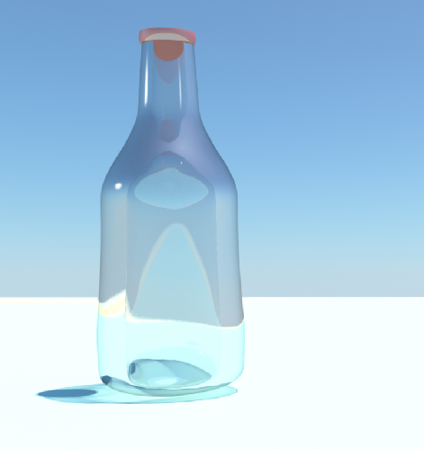
Now, we get this:


sksy2-2013-03-4-15-02.jpg

Notice that the added light from the Mental Ray Sun and Sky material is completely washing out the table on which the bottle sits.  We would have to work with this to get it looking good.

3D animation tutorials

Adjusting the Resolution attribute of a Directional light in Maya.

Shadows as roots.

In the video tutorials on 3DbyBuzz we took several looks at shadows and how they root objects in a scene so that they don’t seem to be floating in the air.

Shadow resolution.

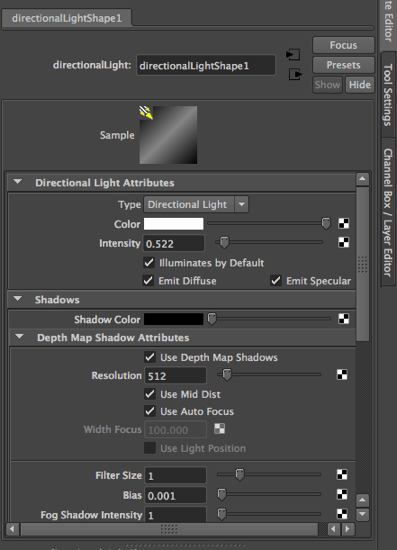
Here, we look at adjusting the resolution of a shadow. First, we create a Directional light by going to Window on the top menu, choosing Rendering Editors, and selecting Hypershade.  Then, inside the Hypershade window, we choose Create, then Lights, then Directional Light. Directional lights are meant to model sunlight, i.e., light that is moving in parallel rays across the scene. With the light selected, we then hit control-a once or twice, until the Attribute Editor of the light appears. We set the shadow Resolution to 512 and choose Depth Map shadows:

resolution512-2013-03-2-22-10.jpg

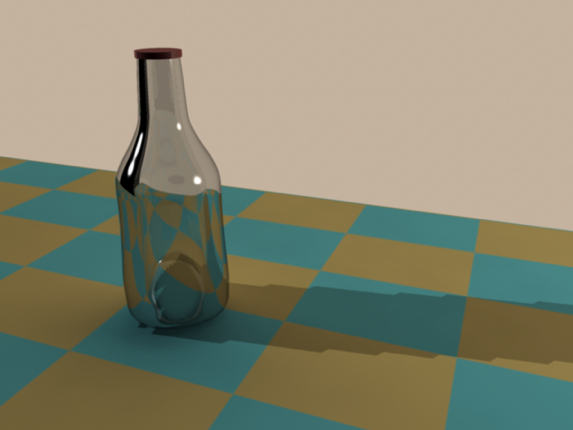
  Then we render our scene, which consists of a glass bottle sitting on a countertop:

light512-2013-03-2-22-10.jpg

We see that the shadow of the bottle is quite jagged.
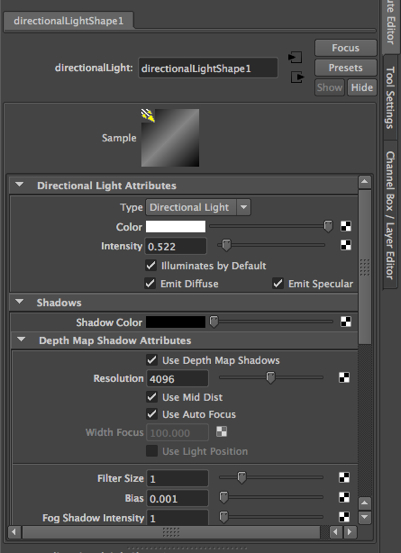
So, we change the resolution to 4096:

4096-2013-03-2-22-10.jpg

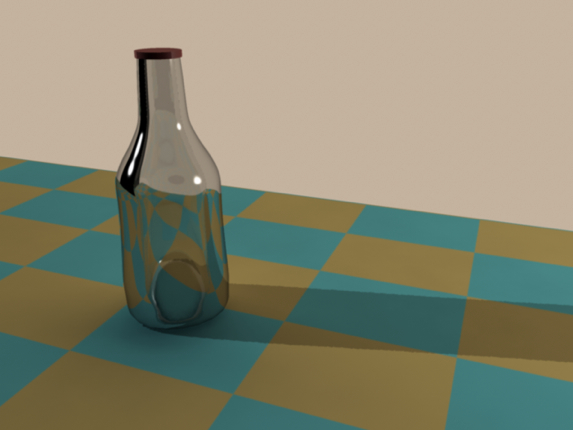
We render the scene again:

light4096-2013-03-2-22-10.jpg

The shadow is much smoother now.


Notes.
The renderings were made with the Mental Ray renderer within Maya.
Depth map shadows, as we have seen in the video tutorials on 3DbyBuzz, are sharper than the alternative, Ray Trace shadows.
Finally, it’s important to note that a Directional light, because it is spread across the entire scene, usually needs a higher shadow resolution than other lights in Maya.

3D animation tutorials

Using the Penumbra and Dropoff settings on a Maya spotlight.

The spotlight and its attributes.

In the video tutorials on 3DbyBuzz, we make use of spotlights, but we are limited mostly to adjusting the Cone Angle attribute and the Intensity attribute.  Here, we will look at two other important attributes: Penumbra and Dropoff.

Three lights in the closet.

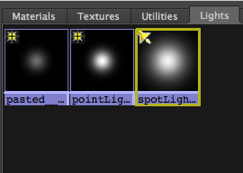
We will use the closet scene we have seen several times in the tutorials and on this blog. Here are the lights in the scene (shown in the Hypershade, by going to Window, and choosing Rendering Editors).  There are two soft point lights inside the closet and a spotlight positioned outside the closet and pointing directly at it.  The spotlight has a cone angle of 94.

MayaScreenSnapz170-2013-03-1-16-09.jpg

Spotlight attributes.

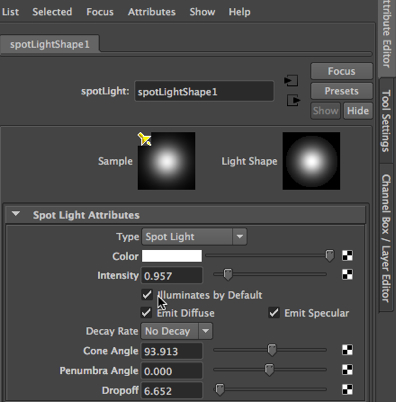
Below is the Attribute Editor that pops up if we select the spotlight in the Main window and then hit a control-a once or twice.

settings-2013-03-1-16-09.jpg

So, just what is Penumbra?

The penumbra is the part of a shadow where some light makes it past whatever is casting the shadow.  It is a softer, gray shadow around the edges. So, we see below that a larger penumbra setting gives us a more gradual edge to the spotlight. And likewise, a penumbra of 0 creates a harsh edge to the light.  Without penumbra, there is no grayish zone.

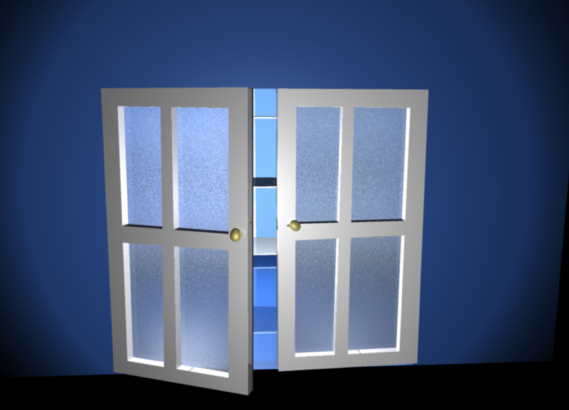
Below, the Penumbra is set to 10 and the Dropoff at 0.

penumbra10-2013-03-1-16-09.jpg

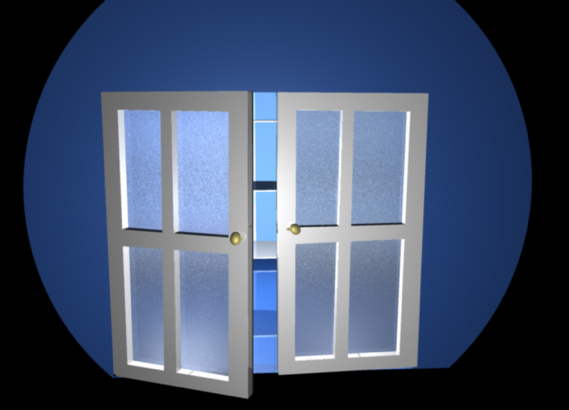
Below, the Penumbra is set to 0 and the Dropoff at 0.


penumbra0-2013-03-1-16-09.jpg


Below, the Penumbra is set to 10 and the Dropoff at 94.
We add a drop off setting here in order to point out that the rate at which the light degrades as it moves through space also has a very powerful impact on the shadows cast by a light.  This is done by limiting the amount of light that touches an object.

dropoff-2013-03-1-16-09.jpg