3D animation tutorials

A start on layers in Maya

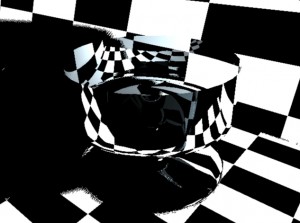
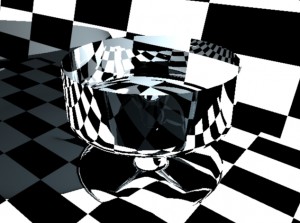
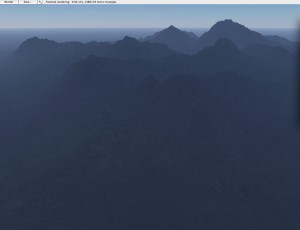
There are three kinds of layers in Maya, and we will quickly overview them here, and then look at them in more detail in future postings of this blog. Please note: you might want to left click on the images below to see them blown up in your browser. Our Model. We will use a closet with moving doors that we used in a few of the tutorials on 3dbybuzz.  Here is the rendered model:

layers-closet-300x221-2013-01-29-22-28.jpg

Layers controls.
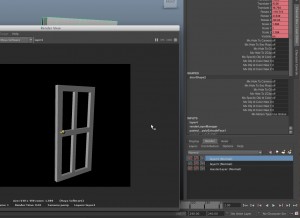
All three kinds of layers can be accessed in the lower right hand corner of the Main Maya window, below the channel editor.  You might have to hit control-a, which toggles between the attribute editor and the channel editor.
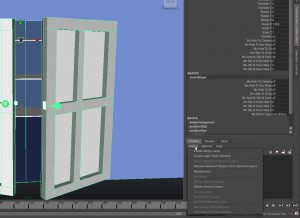
layers-display-300x218-2013-01-29-22-28.jpg

Display layers.
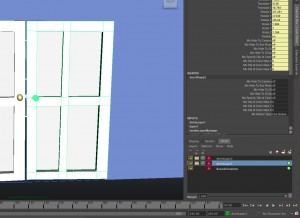
The first kind of layer helps us decide what we want to see in a complex scene we are developing.  We can select objects and then create a layer out of those objects.  In our example, we choose to only see a layer that has the shelves and sides of the closet in it, and not the doors of the closet.
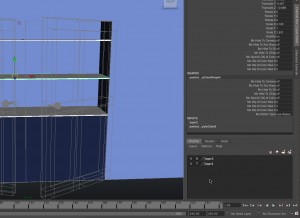
layers-display2-300x218-2013-01-29-22-28.jpg

Rendering layers.
The second kind of layer lets us choose objects, put them in layers, and then decide which layers we want to render.  This allows us to remove items in a scene that might be very time consuming to render, and allow us to focus only on more quickly rendered items.
It also allows us to render one layer of a scene and finalize that layer, and then continue to re-render other layers until we like them.  We then compose the layers in our video editing application.
We can also use render layers so that we can render different parts of our scene with different renderers.
There are also a number of other things that can be done with layers.  We can make multiple render layers so that we can carefully control the light and color effects in a scene.
Below, we render only the right hand door.

layers-render-300x218-2013-01-29-22-28.jpg

Animation layers.
Animation layers can be used to carefully blend different forms of animation in a single scene.  It also allows us to carefully reuse existing animation in a new context.
Here is a look at how to create animation layers.

layers-anim-300x218-2013-01-29-22-28.jpg

We will continue with this in future postings.

3D animation tutorials

Making Your Character’s Body More Organic

Our skinny man. In the 3DbyBuzz tutorials we looked at the Maya skeleton generator, and at doing a soft bind of our skinny man to the skeleton.  We stopped there, but there is more that we could do, and there will be posts in this blog in the future covering these techniques. Here he is:

skinnymanik-264x300-2013-01-28-12-22.jpg


skinnymanrendered-300x244-2013-01-28-12-22.jpg

This posting is a preview of what we can do to create a more organic, natural looking binding.  The key is to simulate the varying sorts of tissue that lies beneath our skin. These include muscles, bones, and joints. What’s wrong? Our character is far from natural looking.  With respect to hardness, he appears to have completely homogeneous tissue.  He’s a rubber man.  Real people have muscles, along with solid bones, both of which can be seen beneath our skin. The Maya muscle system. All of this can be simulated by use the Maya muscle system.  The muscle system can be accessed by setting the Main Menu Selector to Animation, and then going to the Muscle dropdown on the Main Menu. Capsules. Maya has something called “capsules” which are rigid and can be used to make a joint appear solid.  Keep in mind that joints themselves do not have any geometry, and so we use capsules to make it appear that a joint has actual geometry.  We can convert joints to capsules. Bones. Maya also has “bones” which serve a very similar purpose, and are created from polygon geometry, and so their shape can be carefully controlled by the animator.  (These bones have nothing to do with the bones that get laid down between joints as we build a skeleton.)  Like capsules, bones can be created by conversion; we turn joints to bones. Muscles. In Maya, bones and/or capsules are used to create “muscles”, which are attached beneath the surface of your character’s skin.  They will cause the skin to deform.  Each muscle is connected in two places (to capsules and/or bones), and when the limb is extended, the two connection points will move apart and the muscle will extend itself.  As the limb is closed, the two connection points will move closer and the muscle will bulge outward. It’s not trivial to use. The Maya muscle system is difficult to master and calls for a lot of iteration. One thing to note is that making a smooth binding look realistic by inserting muscle tissue is a complex problem.  Muscles are not completely rigid.  They are semi-rigid, and not all muscles extend and bulge in the same way.  Muscles also move as coordinated groups as the human body moves.  All the while, the skin moves over the muscles in a semi-independent fashion, but it does not float freely over the underlying tissue. Cloth. Finally, there is some similarity between muscle/skin/bone systems and the sorts of movement that can be engineered using blend shapes and/or cloth.  

3D animation tutorials

Creating a soft bowling ball with nCloth.

Bowling. In one of the videos on 3DbyBuzz, we created a bowling ball and pins. Pins and ball. The pins were made by creating a curved line.  We did this by using the Create Main Menu selector and then using the CV Curve tool to make the profile of a bowling pin.  We then adjusted the Main Menu Selector at the top left of the Maya Main window to choose Surfaces on the main Menu, and then chose Revolve. We then created a polygon ball. Rigid objects. Then the pins and the ball were all turned into active rigid objects by selecting them and then choosing Dynamics from the Main Menu Selector at the upper left of the main Maya window, and choosing Soft/Rigid Bodies, and then choosing Create Active Rigid Bodies. Sideways gravity. Then we put the bowling ball under the power of a gravity field set to move objects in the z dimension, not the y dimension, as gravity normally behaves.  This is done by going to Fields and then choosing Gravity, and then adjusting the direction attributes accordingly. This is the result when we run the scene:

bowlrigid-300x220-2013-01-27-17-52.jpg

nCloth. Now, lets do this again, but this time, we are using the nDynamics Main Menu selection.  We select our pins and then choose nMesh and then Create Passive Collider.  We then select the ball and choose nMesh and then Create nCloth.  (The ball must be a polygon ball for this.)
bowlsoft-300x233-2013-01-27-17-52.jpg
We see the bowling ball squashing when it hits a pin.

3D animation tutorials

Depth map versus ray traced shadows

This is a quick lesson. A glass bowl. The scene below shows a bowl that we have worked with in the 3DbyBuzz video tutorials.  It has a Mental Ray mia material on it, set to GlassThin.

glass-model-300x249-2013-01-26-22-22.jpg

The floor and the wall both have the checkerboard 2D texture from the Hypershade. Add light. There are two lights in the scene, one coming from the upper right and another coming from the upper left.  Both are spot lights.  The light on the right is far brighter than the one on the left. Thus, when we render the scene (with the Mental Ray renderer), we would expect to get a shadow cast to the left. Depth map shadows. Here is what happens when we select the light on the right, go to its attributes (you might have to hit control-a), then go to Depth Map Shadow Attributes and click Use Depth Map Shadows:

depthmap-300x223-2013-01-26-22-22.jpg

  Raytraced shadows. Now, if we go back to the attributes of the right hand light, and go to Raytrace Shadow Attributes and click Use Ray Trace Shadows (which toggles the Depth Map shadows off), we get:

raytrace-300x223-2013-01-26-22-22.jpg

Notice how much softer the ray traced shadows are.
Ray tracing as a light attribute.
We see here that ray tracing isn’t only a setting that we can adjust in the Mental Ray renderer.  Ray tracing can also be turned on in the shadow properties of each light.
Depth map shadows are calculated by tracing each light ray (or photon) across the scene once, thus casting a black shadow, even though the dish is made of glass.  Ray traced shadows are based on more calculations, as light reflects and refracts.

3D animation tutorials

An intriguing way to smooth a polygon model

In the 3DbyBuzz training videos, we cover a few different ways to smooth polygon models. An intriguing smoothing option. There is yet another method, one that only works with the Mental Ray renderer (not the Software Renderer). First we look at the wireframe of a model, before and after smoothing. We’ll use a version of a Moai polygon model taken from the video tutorials in 3DbyBuzz:

smooth-300x300-2013-01-26-19-59.jpg

Here is the same model after selecting it and hitting the 3 key:

smooth1-257x300-2013-01-26-19-59.jpg

After rendering with Mental Ray.
Below are two renderings of the Moai.  The first is before hitting the 3 key and the second is after hitting the 3 key.
As we saw in the wireframe images, the first one is not smoothed and the second is smoothed.
(By the way, hitting the 1 key sets the model back to its non-smooth state.)

 notsmoothrender-300x296-2013-01-26-19-59.jpg

smoothrender-300x296-2013-01-26-19-59.jpg
No change in the geometry!
We see that hitting the 3 key smoothed out the harsh lines on our stone statue’s left jawline in particular.
However, there is no actual change in the geometry.  If you render the smoothed version of the wireframe with the software renderer, you will get the not smooth rendering.
So, indeed, this only works with the Mental Ray renderer.

3D animation tutorials

Making a wrap-able texture with Maya paint

Wrap-able textures. One of the more tedious jobs an animator must face is creating image-based textures for models that can be tiled without showing a nasty wrap-around edge. In this posting we look at one interesting alternative: using the painting canvas in Maya to create such a texture.

The Canvas. By going to Windows (on the Main Menu) and then choosing Paint Effects, you will reveal the Maya painting canvas.

A new image. On the Canvas window, you can select Canvas and then choose New Image. A window will pop up that will allow you to give your image a name, choose a background color, and select an image size. Since we are going to build a texture that will wrap in both the x and the y dimensions, you might want to make the image a square (not simply a rectangle).

Wrapping. In the middle of the top menu on the canvas window are two icons that need to be selected so that the texture we are making will wrap in both dimensions.  They are white icons with blue paint strokes on them.  There are red arrows on the top of the x-wrap icon and on the left side of the y-wrap icon: paintwraps-300x80-2013-01-22-21-29.jpg

Painting. Next you paint your texture image, while making sure you use both the top/bottom wrapping and the left/right wrapping.  You will have to play around with it.  You should paint strokes that go off the canvas in both dimensions. Painting on the canvas is covered on a couple of the tutorial videos on 3DbyBuzz.com.

Using the image as a texture. When you save your image, it will end up in Documents – Maya – projects – sourceimages.

Create a file texture. Now, create a file texture and make sure it is a Normal (not Projection) texture.  This is all covered on a few of the tutorial videos on 3DbyBuzz.com. Now, use your image from the sourceimages folder as the image for the file texture you just made.

Tiling. Go to the attributes of the file texture and select the place2dTexture1 tab.  (This should be the default name for the first texture you create in your scene.) Set the two Repeat UV numbers to 3 and 3.  (Or whatever non-zero numbers you want.)

An example. Notice that because the paint tool will continue a line that goes off the Canvas by drawing it on the other side of the image, the creator of the image below did not have to manually line up the four lines that go off the Canvas in both directions. Here is the example drawing made on the Canvas:

wendywrapdraw-300x300-2013-01-22-21-29.jpg

The result. Here is what our wrap-able texture looks like on a polygon plane:

wendywrap-300x225-2013-01-22-21-29.jpg

3D animation tutorials

Generating natural terrain with Terragen

There are a number of applications that can be used to create natural looking content for 3D scenes.  Today’s posting concerns Terragen.

Terragen.

The banner image on this blog is a rendering of a scene built with Terragen 2 by Planetside.  It can be used to generate very realistic terrain, atmospheres, and water effects.  In particular, its ability to generate terrain is surprisingly easy to use.
Here is what the interface looks like:

terrageninterface-300x217-2013-01-20-19-13.jpg

Along the top are the items that can be created with this application and inserted into a 3D scene.  They include terrain, shaders, water, atmosphere, lighting, and cameras.

Generating terrain.

The left lower window shows how terrain can be generated with Terragen:

terragenterain-300x263-2013-01-20-19-13.jpg

Hitting the Generate Now button will create, in a semi-random fashion, a polygon mesh terrain based on the parameters set in this window.
This is a closeup of the upper right hand section of the main window.  This is where you can preview your generated terrain.

terragenterraincloseup-300x160-2013-01-20-19-13.jpg

The header image for this blog was created by generating a water effect, an atmosphere, and overlaying that on a generated terrain.

A rendering without geometry.

This is how the scene looks with the atmosphere and water created, but without the terrain being generated, and then the scene being rendered:

mystyonlyoceansky-300x225-2013-01-20-19-13.jpg

A rendering with generated geometry.

After hitting the Generate button and re-rendering the scene, this is what the scene looks like:

mystmountainsfinal-300x230-2013-01-20-19-13.jpg

From there, all I did was crop the rendering and use it as the header image on this blog.

Exporting from Terragen.

One inconvenience is that it is a bit of an effort to export geometry from Terragen and then use it in an application like Maya.  Terragen has to be told to export the geometry of the scene while it is doing a rendering.  The choices include exporting as FBX or OBJ.

What you cannot do with Terragen is export a full, integrated scene, complete with shaders, lights, and all geometry, and then import it directly into Maya.
In truth, Terragen is more easily used as a renderer to create an environment layer, and have that layer composited with a scene rendering from another application, like Maya.