
Wrap-able textures. One of the more tedious jobs an animator must face is creating image-based textures for models that can be tiled without showing a nasty wrap-around edge. In this posting we look at one interesting alternative: using the painting canvas in Maya to create such a texture.
The Canvas. By going to Windows (on the Main Menu) and then choosing Paint Effects, you will reveal the Maya painting canvas.
A new image. On the Canvas window, you can select Canvas and then choose New Image. A window will pop up that will allow you to give your image a name, choose a background color, and select an image size. Since we are going to build a texture that will wrap in both the x and the y dimensions, you might want to make the image a square (not simply a rectangle).
Wrapping. In the middle of the top menu on the canvas window are two icons that need to be selected so that the texture we are making will wrap in both dimensions. They are white icons with blue paint strokes on them. There are red arrows on the top of the x-wrap icon and on the left side of the y-wrap icon: 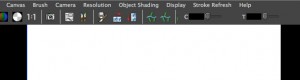
Painting. Next you paint your texture image, while making sure you use both the top/bottom wrapping and the left/right wrapping. You will have to play around with it. You should paint strokes that go off the canvas in both dimensions. Painting on the canvas is covered on a couple of the tutorial videos on 3DbyBuzz.com.
Using the image as a texture. When you save your image, it will end up in Documents – Maya – projects – sourceimages.
Create a file texture. Now, create a file texture and make sure it is a Normal (not Projection) texture. This is all covered on a few of the tutorial videos on 3DbyBuzz.com. Now, use your image from the sourceimages folder as the image for the file texture you just made.
Tiling. Go to the attributes of the file texture and select the place2dTexture1 tab. (This should be the default name for the first texture you create in your scene.) Set the two Repeat UV numbers to 3 and 3. (Or whatever non-zero numbers you want.)
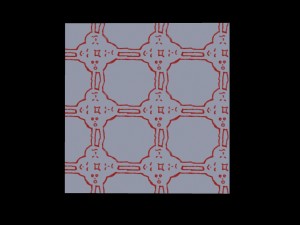
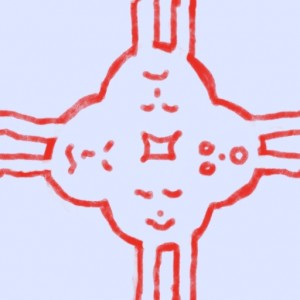
An example. Notice that because the paint tool will continue a line that goes off the Canvas by drawing it on the other side of the image, the creator of the image below did not have to manually line up the four lines that go off the Canvas in both directions. Here is the example drawing made on the Canvas:
The result. Here is what our wrap-able texture looks like on a polygon plane: