
In the video tutorials on 3DbyBuzz, we have looked at the tradeoff between painstakingly crafting detailed geometry versus using bump maps to simulate geometric detail. Here, we look at another alternative, displacement maps, and compare it to bump maps.
Bump Maps. As a reminder, a bump map does not change the geometry of an object. Rather, the normals information in a texture is used to create the illusion of texture on a model. Here is a Blinn material with a checkerboard bumpmap applied to it:
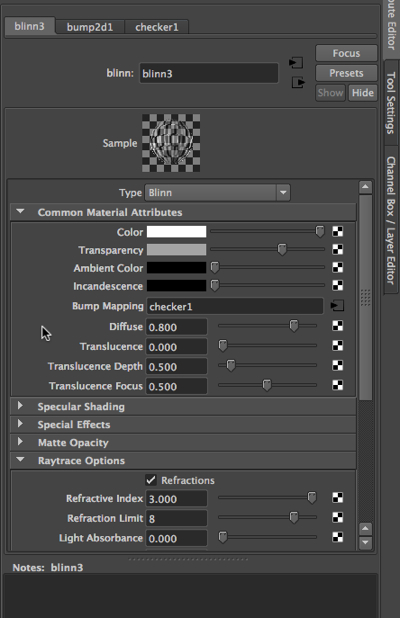
This was created by first creating a Blinn material in the Hypershade, then creating a checkerboard texture in the Hypershade. Then, with the material selected, the texture was middle-mouse-button dragged to the Bump Mapping box in the attribute editor above.
Displacement maps.
Here is another Blinn material, but this time, instead of using a bump map, we are using a displacement map. We don’t do this by selecting the material itself. Rather, we go to the Hypershade and choose the Shading Groups tab (instead of the Materials tab). Then we select the second Blinn. We then create another checkerboard texture and drag it to the Displacement Mat box in the attribute editor of the Blinn Shading node.
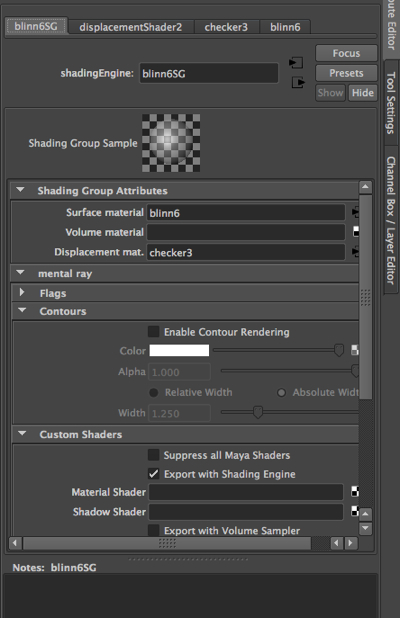
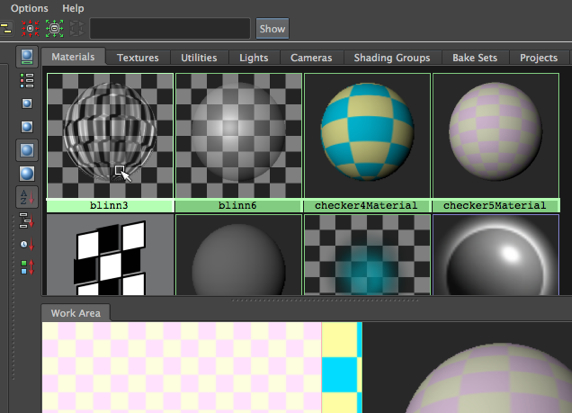
To emphasize this distinction, the image below shows the various tabs in the Hypershade window. Notice that the two Blinns are labeled blinn3 and blinn6, and Maya provides very different icons for the two of them. The first icon gives us a hint that a bump map has been applied. The second icon is more abstract and indicates that we are using a different technique, namely displacement mapping. Notice also that the Materials and the Shading Groups tabs are quite different.
The resulting render.
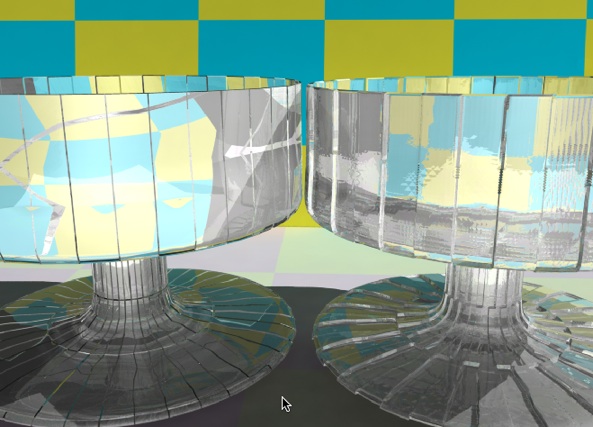
Below are two versions of a polygon glass dish in the same rendering. They are identical geometrically. On the left, a bump map has been used to create the feeling of detailed geometry. On the right, a displacement map has been used instead. And the attributes of how the texture has been projected onto the material are identical. The only difference is that in one, the texture serves as a bump map, and in the other, it serves as a displacement map.
The bump map.
The bump map creates an illusion of texture, but does not give us internal shadows or the sorts of light refractions that true, geometrically thick and detailed glass would.
The displacement map.
The displacement map, on the other hand, does much better. However, it too, is only a simulation, although one that demands more computational time. The geometry of the glass dish has not been changed; rather, at the point of rendering, Maya has substituted a 3D representation of the model, thus providing a true 3D rendering. Notice the depth of detail on the dish on the right. The top of the dish gives a mottled look to the checkerboard that is reflected back to the viewer, while the one on the left simply bends the lines in the checkerboard. And the base of the right dish looks like true geometry, while the one on the left looks like there are simply dark lines drawn across the glass. We’re getting the kinds of internal shadows (shadows being cast by a model onto itself) we expect with true geometry.
In sum.
All in all, the displacement map gives us a much richer sense of thick, cut glass. You can left click on the image below to blow it up: